Adding App Home to Slack app in Python.
Building on Creating a Slack App in Python on GCP, I wanted to continue extending reflect-slack-app to include an App Home.
The App Home screen allows each user in a workspace to have a personalized view powered by the app, which the app can use to share whatever data or interactions (buttons, etc) they want. Want to let folks configure their settings for your app? You can! Want to let folks see their most recent activity? You can! Want to let users know the current status on all open projects? You can!
The functionality is in Beta and before I started playing around with the api, I hadn’t actually realized this functionaltiy existed, although I’d been wanting it to exist. For me, the application home concept is particularly interesting because it’s a great mechanism to (a) summarize information for users, and (b) improve discoverability of app functionality.
It also represents a meaningful step from chatbot and Slash Command driven interactions to a richer, more web-like experience. Alright, onward into the integration.
post starts at commit 5359, and ends at commit 4120
Slack app in Python series
- Creating a Slack App in Python on GCP
- Adding App Home to Slack app in Python
- Make Slack app respond to reacji
- Using Cloud Firestore to power a Slack app
- Distributing your Slack application
Sign up for App Home
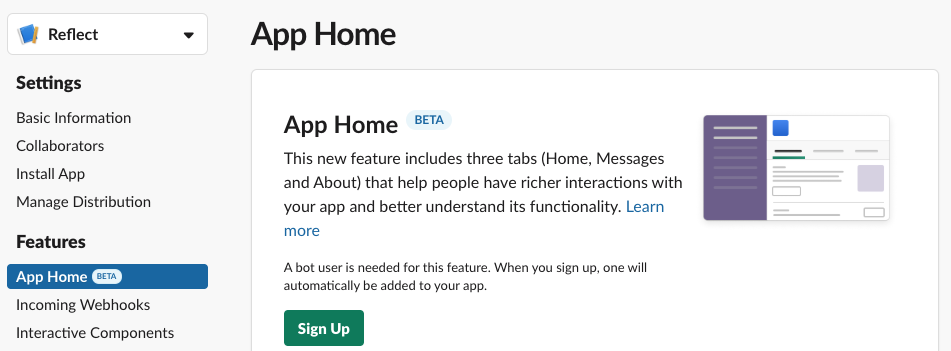
The first step is signing up the App Home functionality in your App dashboard.
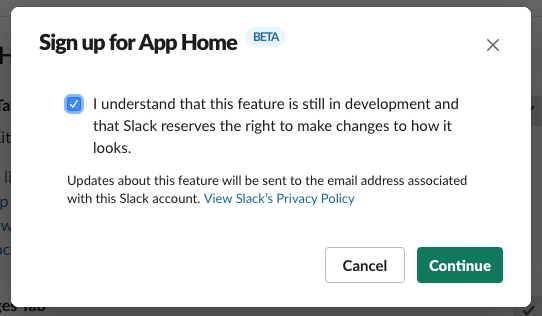
Because this functionality is still in Beta, there is a disclaimer warning you that it might change. Accept it you must.
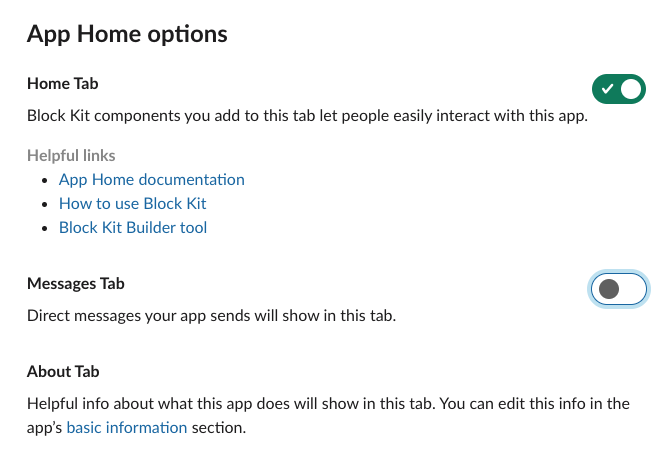
App Home requires a bot user, but we’re not going to be using the bot user for any chatbot functionality
and neither will we expect users to send messages to the bot (they’ll keep using the /reflect and /recall
Slash Commands instead),
so go ahead and disable the “Messages Tab” to avoid confusion.
Now that we’ve setup an App Home, how do we actually render it?
Register for app_home_opened
We need register for the app_home_opened event
from the Events API.
That means we need to integrate with the Event APIs before going any further.
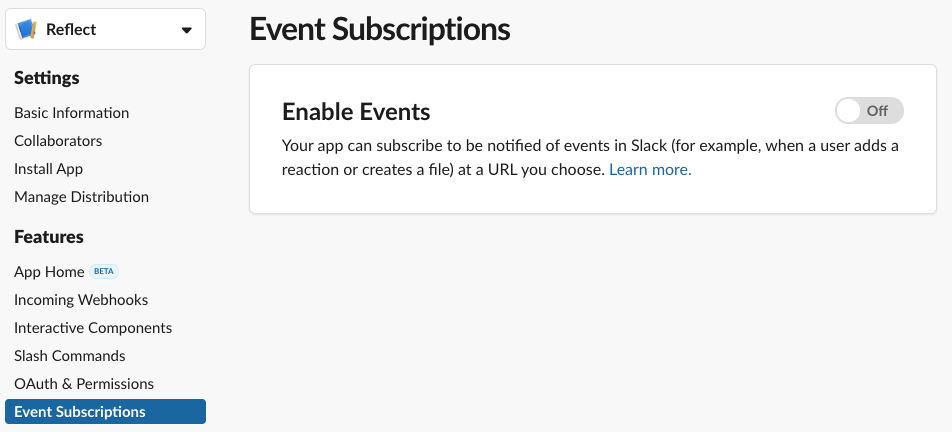
The first step is enabling Events API in your App dashboard.
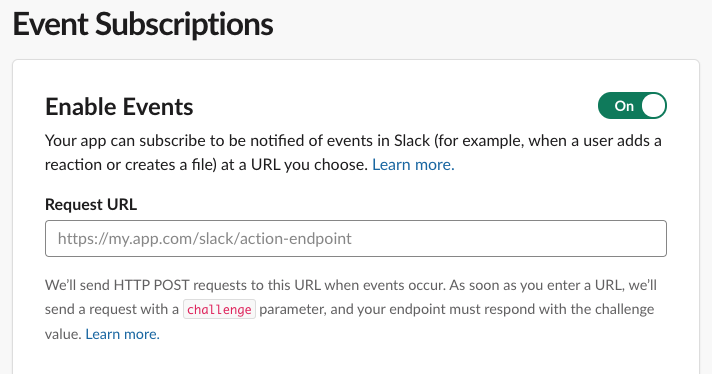
Once the Events API is enabled, the next step is setting up a Request URL.
That in turn requires setting up a handler for the url_verification event.
When we add our URL, they’ll send over a message encoded in application/json (unlike the Slash Commands, which are application/x-www-form-urlencoded).
{
  "token": "random token",
  "challenge": "challenge to return",
  "type": "url_verification"
}
Within that message is a challenge key-value pair, and we want to
return that value within a JSON message.
{
  "challenge": "challenge to return"
}
Kicking off our integration,
it’s time to pop over to the lethain/reflect-slack-app repository,
starting from commit 3aa6, and
opening up reflect/main.py to add a new function:
def event_post(request):
    signing_secret = os.environ['SLACK_SIGN_SECRET'].encode('utf-8')
    verify(request, signing_secret)

    parsed = request.json
    challenge = parsed['challenge']
    return jsonify({"challenge": challenge})
Notice that we’re using verify to verify the request’s authenticity.
Verifying request signatures is the “modern” way to verify messages from Slack. There is
another older method using the token parameter sent by url_verification. Using that deprecated approach, you’d capture
the supplied token (random token in the above example) and
verify all subsequent requests include that token.
Since we’re verifying request signatures, it’s safe to ignore the token.
Now we need to create a new Cloud Function serving the event_post
function.
> gcloud functions deploy event_post \
--env-vars-file env.yaml \
 --runtime python37 \
--trigger-http

Allow unauthenticated invocations of new function [event_post]? (y/N)?
> y
Deploying function (may take a while - up to 2 minutes)...
This will return a URL along the lines of:
https://your-app-here.cloudfunctions.net/event_post
Which we add to Events Subscriptions tab in the App dashboard.
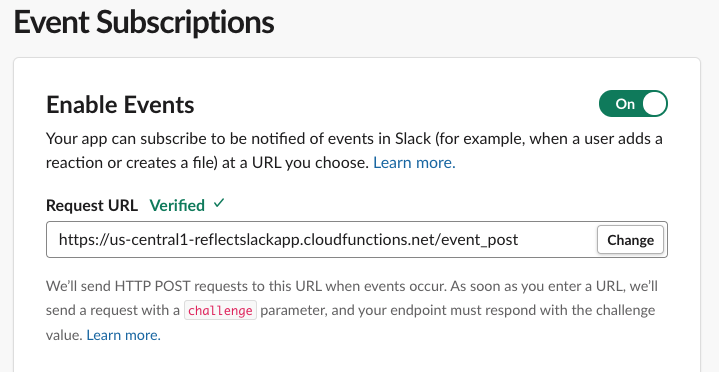
When you paste in your URL, Slack will automatically verify it and either display “Verified” above or show some super helpful debugging information below, including your endpoint’s unexpected response.
Once your URL is verified, open up Subscribe to bot events and subscribe to the app_home_opened
event.
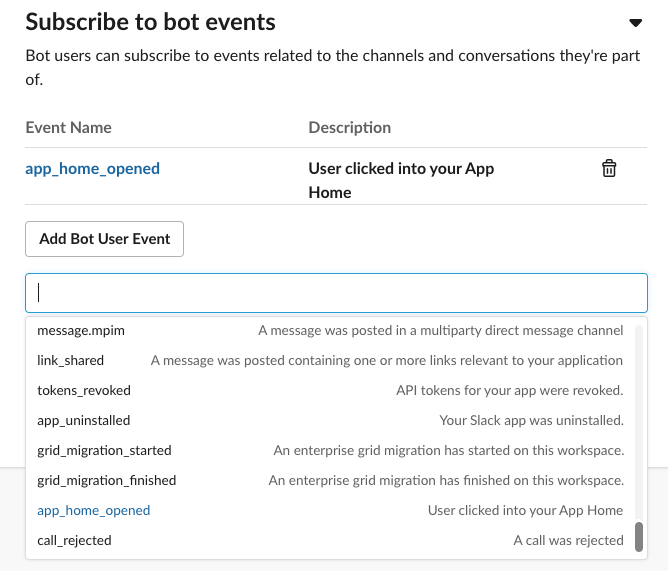
Finally, you must click Save Changes at the bottom. It’s a bit easy to miss, but you’ll have to redo these steps if you accidentally close the tab without saving.
Reinstall app

Now that we’ve enabled the App Home and Event Subscriptions, we need to reinstall our application to request these additional permissions.
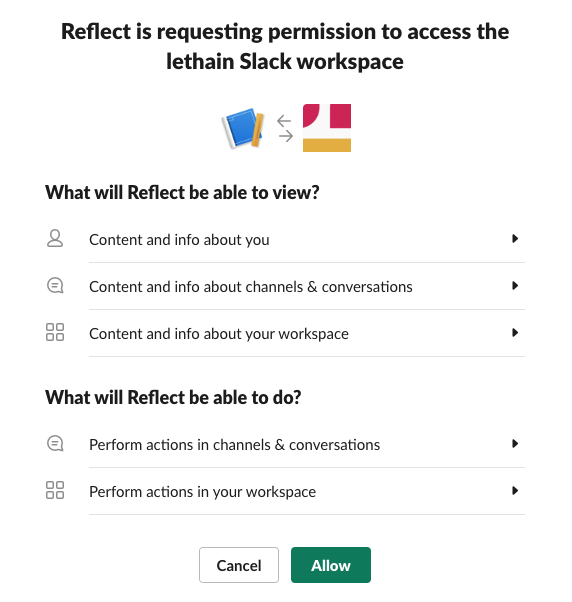
And now something amazing has happened, your application’s App Home is available now if you go back to the workspace where it’s installed and search for the application’s name.

So click on it and let’s get started.
Routing events from Events API
The first time you load your App Home is a bit sad, showing a “work in progress” screen. We’re going to fix that, eventually, but it’s going to require a few steps.
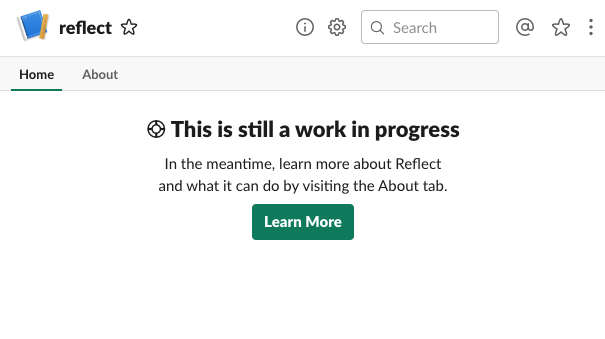
First we need to handle the app_home_opened event that is sent each time
a user visits their App Home for your application.
The Events API has two layers of event types, so the requests
that event_post will receive are structured like this:
{
  "type": "event_callback",
  "event": {
    "type": "app_home_opened",
    "other": "stuff"
  },
  "other": "stuff"
}
Knowing the format, we can refactor event_post a bit to split up handling different
message types and event types.
def event_post(request):
    signing_secret = os.environ['SLACK_SIGN_SECRET'].encode('utf-8')
    verify(request, signing_secret)
    parsed = request.json
    event_type = parsed['type']
    if event_type == 'url_verification':
        return url_verification_event(request, parsed)
    if event_type == 'event_callback':
        return event_callback_event(request, parsed)
    else:
        raise Exception("unable to handle event type: %s" % (event_type,))

def url_verification_event(request, parsed):
    challenge = parsed['challenge']
    return jsonify({"challenge": challenge})

def event_callback_event(request, parsed):
    event_type = parsed['event']['type']
    if event_type == 'app_home_opened':
        return app_home_opened_event(request, parsed)
    else:
        raise Exception("unable to handle event_callback event type: %s" \
                        % (event_type,))

def app_home_opened_event(request, parsed):
    print(parsed)
    return "to be implemented"
If we deploy this updated version and tab away from and back to our App Home,
then our logs include a complete event message for app_home_opened:
{
  'token': 'token-token-token',
  'team_id': 'tttttttttt',
  'api_app_id': 'aaaaaaaa',
  'event': {
    'type': 'app_home_opened',
    'user': 'uuuuuuuuuu',
    'channel': 'ccccccccc',
    'tab': 'home'
  },
  'type': 'event_callback',
  'event_id': 'eeeeeeeeee',
  'event_time': 1500000000
}
Now, you might dream that we just need to update our app_home_opened_event function
to return some Block Kit elements to have them render,
but it’s not quite that simple. Instead our handler will need to integrate with
one of the Slack Web APIs, views.publish.
Calling Web APIs
Slack’s Web API is a pretty typical HTTP API.
In our case, we need to send a POST request to views.publish at
https://slack.com/api/views.publish
We’ll be sending application/json request bodies which look like:
{
  "user_id": "uuuuuuuuuuu",
  "view": {
    "type": "home",
    "blocks": [
      {
        "type": "section",
        "text": {
          "type": "mrkdwn",
          "text": "To be implemented"
        }
      }
    ]
  }
}
Each of those blocks conforms to the format we previously used to render responses to Slash Commands.
We’ll also need to include our bot’s token, which you can find in the OAuth & Permissions tab of your app dashboard, as an HTTP header:
Authorization: Bearer xoxp-xxxxxxxxx-xxxx
We’ll start by extending reflect/env.yaml to include that token:
SLACK_SIGN_SECRET: your-signing-secret-here
SLACK_BOT_TOKEN: your-bot-token
We’re going to send requests to Slack’s APIs using
Python’s requests library.
The first step towards that enviable goal is adding requests/requirements.txt to our repo so Cloud Functions
is aware of our dependency:
requests==2.20.0
We’ll also want to install that locally for any local validation we do into the virtual environment we created last time:
source ../venv/bin/activate
pip install requests==2.20.0
Then we can write a utility in reflect/main.py to
perform requests:
import requests

def slack_api(endpoint, msg):
    url = "https://slack.com/api/%s" % (endpoint,)
    bot_token = os.environ['SLACK_BOT_TOKEN'].encode('utf-8')
    headers = {
        "Authorization": "Bearer %s" % (bot_token.decode('utf-8'),),
        "Content-Type": "application/json; charset=utf-8",
    }
    resp = requests.post(url, json=msg, headers=headers)
    if resp.status_code != 200:
        raise Exception("Error calling slack api (%s): %s" % \
                        (resp.status_code, resp.content))
    return resp.json()
There are a few details within slack_api worth mentioning.
First, we’re setting the Authorization header to verify our identy,
and requests will fail if it’s not properly set.
Second, the Slack API considers it a warning if you don’t specify character set,
so we’re ensuring that Content-Type specifies one.
Rendering our App Home
Now that we have this utility, we’ll call it along the lines of:
msg = {'some':' stuff'}
slack_api("views.publish", msg)
We can finally do something useful when we receive the
app_home_opened event and have it render roughly the same
content as we return through the /reflect Slash Command:
def app_home_opened_event(request, parsed):
    user_id = parsed['event']['user']
    team_id = parsed['team_id']
    items = recall(team_id, user_id, "last 14 days")
    items_text = "\n".join(["%s. %s" % (i, x) \
                            for i, x in enumerate(items, 1)])
    blocks_spec = [
        ('mrkdwn', "Your home tab for Reflect"),
        ('divider',),
        ('mrkdwn', items_text),
        ('divider',),
        ('mrkdwn', "Some more stuff here"),
    ]
    blocks = [block(*x) for x in blocks_spec]
    msg = {
        "user_id": user_id,
        "view": {
            "type": "home",
            "blocks": blocks,
        }
    }
    resp = slack_api("views.publish", msg)
    return "OK"
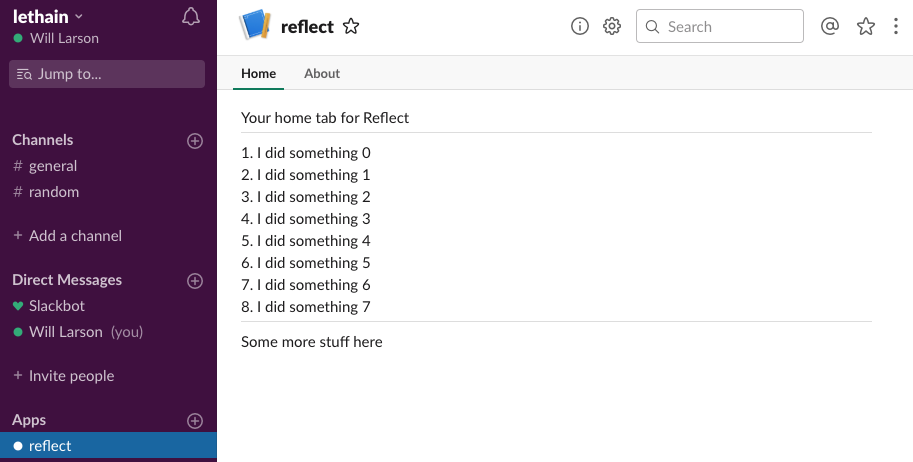
If we deploy that updated code and then reload our App Home tab, then something pretty great happens…
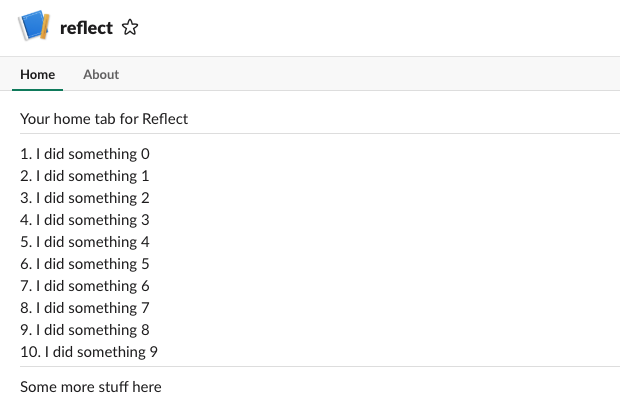
…it actually works!
Making App Home useful
What we’ve done here is quite basic, but you could imagine going much further with the concept.
This could be used to configure defaults how many days of results are returned by /recall,
it could be used to create an export-to-email widget, it could show the number of tasks you’ve
recorded for the trailing three months, etc.
You could even imagine it injecting a personalized image with a histogram of your projects by tag or some such, although I’m not quite sure what the authorization story would be for loading user-specific generated images, and looking at the image block spec I suspect there isn’t one quite yet.
In the context of the toy Reflect application, I suspect the most important functionality would be showing a summary of recently added tasks and examples of how to use the various Slash Commands to aid with discoverability.
Next
The goals carried over from the first post on this project were (1) getting the App Home set up, (2) letting users add accomplishments via reacji, (3) integrating an actual database, and (4) publishing into the application directory.
As we reach commit 4120 in lethain/reflect-slack-app, we have a simple but functional App Home, letting us scratch one more item off that list. We’ve also integrated the Events API, so I suspect the reacji integration will be pretty straightforward, which is what we’ll do next.
series continues in Have Slack app respond to reacji